Showing posts with label design. Show all posts

Friday, August 3, 2018

Tool time


     My father was an aircraft mechanic in the Navy during World War II. He worked on a Martin PBM-552 "Mariner" out of Banana River Naval Air Station in Cocoa, Florida.  Part of his personal myth was that he was drafted out of his high school classroom the day after he turned 18, and he didn't finish high school until he returned from his service.  I don't actually believe this because he didn't report for duty until the July after he would have graduated.   That information is on his discharge papers.  It's probably partially true though.  The Navy rep probably showed up at school to draft him after he turned 18 but they let him finish high school.  He wasn't sent to an active combat area because both his brothers were already at the front.  In case you are wondering, the Air Force as a separate branch of the military wasn't established until 1947.  After the war.  His other story from his time as a mechanic was, the navy didn't allow the plane he worked on to fly without him riding along.  This could be true.  It seems like a pretty good  way to insure an 18 year old mechanic learns his job fast and well.  My father was a really good mechanic although he used the GI bill to go to college so he didn't have to spend his life fixing engines.  Except that he did.  My father only ever had one tool box.  It weighed approximately 182.3 lbs.  Every tool he ever owned was tossed into that tool box.  In retrospect, I think the most stunning thing about my father's tools was that he didn't have a single screw driver that wasn't stripped.   I don't know how he used them, but he did.  His tool box was chaos and it weighed more than an average human, but if your car broke down and you called him, he would "toss" the tool box in his car,  go to you, and using those useless screw drivers have your engine humming in no time.  Because of my father,  I spent decades with an old pair of stockings in my glove box.  I don't know if that's still a thing.  My father isn't around anymore so I use AAA.  Anyway, even though his tools appeared to be a crazy mess to almost anyone who ever saw his tool box, he understood it.  He knew exactly what he had and how to use it.  It was his system and it worked for him. 
  
This is the plane my father worked on.  Not this one but this model.

     My grandmother, on the other hand, was a musician and urban farmer.  She was strictly a musician until World War II when she was asked by her country to plant a victory garden.  So she did.  Then she was a musician and an urban farmer.  I think she dedicated herself to learning how to grow food in the same way she had dedicated herself to learning to play music.  She also took care of her tools with the same care she used on her instruments.  By the time I came along, well after the end of the war, my grandmother was growing food on an acre of land in the middle of Denver.  She grew enough food to feed the whole family and each fall was filled with the sound of canning jars popping.  I didn't really taste "store bought" vegetables until I went off to college.  My grandmother had some wonderful quirks.  One of them was that if she sent my father and me out to pick peas in the spring she didn't expect to get any back.  We just ate them as we picked.  The same went for sending me out to pick strawberries in the summer.  She'd send me out with a bowl to gather strawberries to make dessert for supper, and I would return with a bowl with one strawberry in it and my hands and face covered in strawberry juice.   My grandmother would eat the strawberry and then we would make chewy bread, which was my grandmother's version of brownies, for dessert instead.  I now believe sending me out to pick anything was just a ploy to get me out of her hair, but if you have never tasted spring peas fresh off the vine or little jewel type strawberries ripe and warm in the sun, you should definitely put those things on your bucket list.  Those are the food pleasures that no artisanal cafe can even touch.  Anyway, my grandmother was fastidious with her tools and her musical instruments.  Each tool had a place so that she knew exactly where it was and after it was used but before it was put away, it was cleaned.  And just as my father's system worked for him, hers worked for her.
 
This is a Martin flat back mandolin.  My grandmother had one of these and it's what she played most of the time.  She was apparently an exceptional violinist until she met my grandfather who was an exceptionally bad driver.  The family story is that he had a head on collision with a truck while trying to pass a street car while driving his motorcycle with my grandmother in the side car.  He had no injuries which was how it always went for him, but my grandmother was thrown over a wall and ended up with a broken arm that was set in a way that meant she could never play the violin again.  Good musicians meets bad driver.  So she played the mandolin, opened a music school, and learned to grow things. 


     I live somewhere in the middle of these two extremes, but my point is that you need to find your own relationship with your tools.  Once you are comfortable with your tools you will do good work.  This is probably why I keep repeating that I am not a purist.  The work that I do is more important than the specifics of the tools that I do it with.  So as I move forward talking about tools and setting up a shop, keep yourself focused on what you want to do.  There are a lot of means to each end and you need to find the one that works for you.  

     If you are following along with me and building your shop, you now have a massive and sublimely beautiful work table and a stock rack.  Plus a couple of metalworking tools.  You also have less money than you had before and you met your steel yard supply guys.  I really love all my steel guys and I told you last time not to fear them.  They are the best.  The last delivery I got was a week or so ago and it's been really hot here so the steel is really hot on the truck.  I have some beat up work gloves so I put one on to go unload the truck.  The driver just couldn't deal so he reached into the cab and gave me a new pair of work gloves.  He didn't want me to hurt myself.  As he was about to leave he handed me a second pair because he figured I would lose the first pair like he does.  These guys are always so great. 

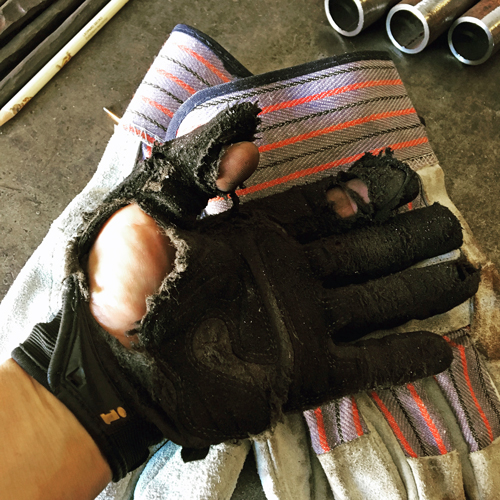
The work glove I put on to unload the 115 degree steel and the gloves my driver gave me.
     
     You've also started to think about what you need to do the kind of work you want to do and what would make it easier.  At this point you can go in a number of directions.  If your goal is to do primarily fabrication type work, you can slowly acquire tools that make that easier.  A better way to cut steel.  I use a 7x12 metal cutting band saw.  A lot of people chose to use a cut off saw.  The cut off saw is cheaper but I don't really love the fiber glass particles that it propels into the air.  The "dust" from grinding or cutting with a fiber glass disc does two things.  The metal dust falls to the floor because it's heavy, but the fiber glass particles fly around forever because they are light.  You really don't want those suckers in your lungs.  For me the extra expense of the band saw is worth it.  


This band saw is pretty close to mine.  I don't know what all the little plugs on the lower left are, but the rest is basically the same.  There are smaller band saws, and you can buy a portable band saw and a frame to convert it.  Harbor Freight has one too.  I don't know how the Harbor Freight saw works.  I had a smaller band saw and the problem with those is that the blade is small so it skates.  That means your cuts are not square.  If you are only cutting small stock a smaller band saw is fine or even a large shear.  If you are going to cut larger stock this band saw is a versatile choice.  Band saws are slower cutters so if you are doing production work you probably want a cold saw.  I think of that as a larger shop tool so I'm not going to go into it.  They are pricey but a really sweet way to cut steel.  But they are pricey. 

This is a chop saw.  The fiber glass disc wears away as you cut.  It also spews fiber glass all over your shop.  As I said, the fiber glass dust floats.  This cuts pretty fast, but it's really loud.  Wear lung and ear protection unless you don't want to be able to hear during your short life.  These are relatively cheap and worth every penny.  A lot of fab shops use them.  I really don't like them as you can probably tell. 


     You should also get a drill press.  I got mine at an auction and if that is possible, it's a great way to get tools.  You need to pay attention to the chuck size on any drill press you are looking at.  A 3/8" chuck will drive you insane in a pretty short period of time.  Get at least a 1/2".  It will be tricky on teeny holes but much better the rest of the time.  Also, I prefer a floor model.   


This beauty is exactly my drill press.  It's all cast iron.  It's really old, but it works.  I should probably replace the chuck.

I don't really know about the new drill presses, but this one looks pretty nice.  You are going to need to do some research on this. 

     The last really basic tool is a disc and/or belt grinder.  I have a couple of these.  If you are going to make knives, you will need to do some research to find the best grinders for that.  I like the one I have.  It has a quick change unit and mounts on a bench grinder so I can change the belts in a couple of seconds.  This is good if you are making knives, but even if you aren't making knives work will be easier with a disc or belt grinder or both.  There are so many of these and this is a really personal decision.  Figure out what you are going to do with it and pick the grinder that does that. 

 
This is a basic bench disc grinder.  I would get a 12" dia.  It's a pretty useful tool.

This is the quick change belt grinder I have.  It's a Multitool attachment kit.  You attach it to your bench grinder.  The belt is really easy to change so you can go from roughing to polishing very easily.  I'm sure it's not good enough if you are making knives professionally, but it works for my needs. 


     I have a lot of other tools because I do a lot of different types of metalwork.  Some I got because they were there and it seemed like a good idea.  This is why I have four anvils.  Nobody needs four anvils.  I also have a lathe.  I use it all the time.  I got by before I had it, but a guy was getting rid of it and I couldn't pass it up.  I'm happy I have it.  I had a little milling machine for a while.  It was too small so I traded it for something.  I don't actually remember what now.  I know it wasn't money.  I have a Hossfeld bender.  I used to use it more than I do now.  I have a shear.  I have a compressor.  Most tools after the basics are purchased or made for a specific job.  Then they become part of your arsenal.  You can do more because you have the tool to do more.  

This is a Hossfeld bender.  It is designed to bend steel cold.  It has a number of dies so you can bend different steel shapes into different steel shapes.  It's a pretty amazing tools actually. 

    There are a lot of ways to work with metal.  Each practice has its own set of tools.  Of course there is overlap.  As we go forward, I'm going to talk about the thing that I think most people are interested in first and then move on to some tools and techniques that I think are interesting too.  Next month I will begin to go into the tools necessary for blacksmithing which includes bladesmithing tools.  As I talk about tools I will also start to introduce techniques.  

     I hope you will practice your welding so that you are comfortable with that and are ready to use a hammer.  In the meantime make a feed table for your saw.  Make some horses.  Make a feed stand for long pieces on your disc grinder and drill press.  There are a lot of pieces of shop equipment that you will need and need to make for yourself.  This is the month for that.  Enjoy the learning process.

Such a fancy feed table.  Mine is so crude compared to this, but it works.  This is just an idea.  It doesn't need to be this fancy.  It doesn't need these rollers.  You can make rollers with solid bar and pipe.  It doesn't need to be height adjustable, but that is nice.  Take this opportunity to design what works for you.

You can buy this stand cheap at Harbor Freight.  They fall over.  They are too light.  Design a better version for yourself and make it. 

This is a horse.  It is not the horse you need to make for your shop, but it is a pretty cool horse.


Back to the heat...
Go have fun.

j

Tuesday, March 20, 2018

From bedspreads to traffic interchanges ... or something


     I've had the same bedspread for the last few years.  It has stitched stripes.  At the risk of revealing too much about myself, I will tell you that I always make my bed in the morning.  For me, that makes evening like my birthday where I get to open a present to get into bed.  Since getting this spread, I have very carefully lined up the stripes of the spread running the long way down the bed.  Over winter break my daughter was home from school and slept in my bed.  In the morning I walked in and she had very considerately made it.  Only she had the stripes running the other way, across the bed.  It turns out I had been making the bed the wrong way the whole time.  The spread fit correctly her way.  I now make the bed this way, with the stripes running cross-ways,  but it doesn't look right to me.  The spread fits right but the stripes go the wrong way.  I feel like it makes the bed look stubby. 

     This is a design thing.  Line is a fundamental element of design.  The most basic element.  Line leads the eye.  I don't want to look back and forth across my bed as if I were reading a book.  I want to take in the length of the bed.  I want to enjoy the idea that I will be long and horizontal on the bed.  I don't want myself all chopped up.  The professional designer who designed my spread obviously disagrees.  Eh.

     There are a few elements of design.  There are also principles for the use of the elements.  Ideas about the effect of the use of design elements.  People study this stuff for years, but I think all of us know the difference intuitively.  My drawing professor made merciless fun of people who said I don't know anything about art but I know what I like.  What you like is what speaks to you.  It's okay to educate yourself about art but it's also okay to like what you like.  Design is the same in some ways.  We all know when something is visually a bit off.  We also know when we feel comfortable in a space or with an object.  All of us intuitively understand balance and harmony in design and we understand emphasis. 

This is the first thing designed by Philippe Starck that I loved the design of.  It's just a juicer but it's so elegant.

        This doesn't mean that design needs to be predictable.  One of my favorite designers is Philippe Starck.  I still feel bad about correcting a snooty sales clerk in a furniture store who mispronounced his name.  Ok I feel a little bad.  The clerk was one of those people who ... I don't know, I'm sure the Germans have a word for it.  Anyway, I love the work of Philippe Starck because he redesigned common objects and made us look at them.  He made us see.  There's really nothing more magical than that. 

Which is not to say that he didn't fail.  This is a tea pot and a function failure, but it's interesting to look at.

      We are so used to sitting in chairs and sleeping in beds, eating with forks and cooking in pots, that we forget all the design work that goes into all of these things.  Making things that look good and work is not easy.  Making people really see those things is even more difficult.  All of us design.  We decorate our homes.  We set our tables.  We pick sheets for our beds.  Some of us are probably better at it than others which is fine if it's your home or your sheets.  If it's public, or if you make your living doing it, you should understand what your choices say.  Design choices like statements in art need to be deliberate and conscious.  I'm not saying there can't be serendipity.  I'm just saying if you are being paid to do something you should think about and understand what you are doing. 

    There's an interchange in Las Vegas where four lanes of traffic are forced to squeeze into a single lane to access a highway.  There is no time, day or night, where this bottleneck isn't moving at a crawl.  The funny thing is, there is room for another lane.  Maybe I don't see the future plans for this traffic spot, but it seems like bad design to me.  I think most people would agree.  


It's probably not possible to see the giant mess that the design of this interchange creates.
You can get a sense from the map and satellite view though.

      I don't think there is any real difference between designing a traffic interchange and designing a chair or a living room.  Function is the primary focus of designing something functional, but even that can be overdone.  Often design isn't good because the single object is forced to have too many functions.  Witness the sofa bed.  They are usually terrible places to sit and worse places to try to sleep.  The metaphorical jack of all trades master of none.  

 
     If you pay attention you can get a huge amount of information from design.  You can learn what the designer wants to emphasize, what the designer values, and how the designer wants you to feel.  Design can direct your eye and your heart.  You can be told without a word that something has value or that it is cheap.  Look at the Tiffany's window vs. the Woolworth window (another thing learned in school).  Clutter in design, too much information, usually says cheap.  Clutter is not the same as detail.  Detail creates value.  That single piece of jewelry in the Tiffany's window has exquisite detail.  

It was a little bit hard for me to find a window display from Tiffany, but this is one.  It tells one story.

I don't know if there are any Woolworth stores left.  The windows have a lot of stuff.

     I'm thinking about design a lot lately as I try to navigate how to present my work to the public.  I don't really want to work in a vacuum.  I do, but it's not really my goal.  As I move forward, I will need to apply good design to remaking my website, creating my work, and creating a public presence.  Even if my work is art, and as I've said before I'm confused on that front,  I will still need to use deliberate and good design to present my work.  And I will have to own it.  I will have to take control.  Trickier than you might think for someone who is temperamentally a Luddite like hermit. 

     Scale being one of the elements of design, I think I will start there.  Micro.  That's the scale I am starting with.  I'll let you know how it goes.  Look for a new website from me in the next couple of months.  This will be a huge challenge for me because I need to figure out the primary function of my website and not try to make it have too many functions.  I don't want the Swiss army knife of websites, but I don't want to have multiple sites either.   Once it's up I hope you will comment on the design.  Let me know what you think.  Also look around and be a critic of all the design you encounter.  Also, soon I will have a new bedspread. Those stripes are making me nuts.

Back to work.  I have much to do
j

Friday, October 13, 2017

The magic of muriatic acid


      I was working on a new coat hook design and working through what screws to include with the hook when I realized that there is no perfect screw that will work for every application.  This is sad. What follows is my attempt to help rectify this for the average person. Or perhaps the person with no fear and time on their hands.  

The coat hooks I'm working on.  These are made from scrap square bar. Slotted screws not hammered.  


Hammered Phillips head screws.  You can see how rough the slots are.


Hammered Phillips head screw. 


     I think if you are reading this you probably have a fantastically funky home and amazingly wonderful taste.  It follows that somewhere along the line you bought some forged hardware because ...hey...it's beautiful.  You may have gotten it online from one of the big players (or a small shop like mine) or at a festival or even from the local hardware store, but when you tried to install it you discovered that the screws aka mounting hardware didn't work for your situation.  They might have been the wrong length or the wrong type or maybe there wasn't any mounting hardware.  The supplier of the beautiful forged  hardware was no help, mostly because they are not me, so you went to the local hardware store and got some screws that would work.  Those new screws were perfect except they were bright silver and not the wonderful color of forged iron.  Rather than live with that you either returned the forged hardware in frustration or maybe you painted the screws, or if you are like me, you colored the screws with a Sharpie.  (This is not a paid endorsement.  I'm not opposed to paid endorsements so if you want to pay me to endorse something, drop me a note.)    I admit to using a Sharpie on occasion to fix a color issue on my hardware.  I'm helpful, not perfect.


     There are, however, a couple of other probably better solutions to the bright silver screw or bolt problem.  For this muriatic acid solution the screw has to be zinc plated.  I think it's also called hydrochloric acid.  It can't be stainless steel or nickel plated although you can darken both of those too.  I'll get to that later.  The easiest at home solution to darkening zinc plated screws is muriatic acid.  If you have a pool, you already have some.  If not, it's pretty cheap, comes by the gallon, and can definitely hurt you and possibly kill you if you aren't careful.  Also it's available at all the usual home improvement stores.  The important thing for this application is that it dissolves zinc. 

A really bad picture of zinc plated screws
      In order to get the zinc off the screws they need to be immersed in the muriatic acid.  The guy I learned this from used a piece of steel wire to dip the screws in the bottle of acid.  It only takes a couple of seconds.  I like the acid to remain fresh and I do this a lot so I usually pour a little acid in a plastic cup and drop the screws in.  For the samples in the pictures, I just put a little acid in the lid. 
 
On the left is the plated screw.  On the right is the screw with the plating removed by the acid.
     Once the plating is gone, rinse the acid off the screws and let them dry.  They will probably be a little rusty, but they will be the dull grey color of steel.  After that you can hold the head in the flame of your stove while holding the screw with a pair of pliers until the head turns black.  I would then dip the head in wax.  You can also oil it with kitchen oil.  Like seasoning a cast iron pan.  I had a buddy who seasoned his cast iron pans with Crisco ( Again, not a paid endorsement, for the buddy or Crisco). You can probably use that too.
 
     I think this is a fairly easy way to get a better look for forged hardware.  It doesn't give you a hammered look, but at least it's not bright silver on black.  
 
The plated screw.  The screw with the plating removed.  The screw heated in the stove and waxed.  My dirty hand.

     I'm trying to make hammered screws for my hooks.  I tried to find slotted screws at the big box home improvement stores.  They only have Phillips head.  Phillips head doesn't work that well when I hammer the head so when I have a big enough hardware order, I will add a box of slotted screws to supply with my hooks. I can clean up the slot after hammering much better than I can clean up a Phillips head.  Once I have the screws, I can list the hooks for sale.

    I should mention that there are a couple of caveats with this process.  You do not want to touch muriatic acid.  It's acid.  You also do not want to breath the fumes.  Do this process outside and don't stand over it.  I'm pretty sure breathing the fumes will mess you up.  Once you have removed the plating, the screws will rust. If you want to look at a list of safety tips, click here

    If you need blackened screws or bolts for a bathroom, you could try just holding a stainless steel head in the stove fire. This would also work for nickel plated screws.  Neither of those will rust as readily, but they are also more money.  Natural gas heat on the stove would probably be enough heat to make the head turn black.  It may take a bit longer. I don't know because I have a propane torch, and a forge and an oxy-acetylene rig. (google spell check wants to change this to foxy-acetylene.  What is foxy-acetylene?  Please tell me if you know unless it's going to scare me.)  I don't actually use the stove.  

   The best looking decor is consistent.  You want the mounting hardware to match the rest of the hardware.  This is a little step in that direction. 

    I hope this works for you without pain.  

    Now I need to get back to work.  Until next time

    j